Micro:bit Picosat Series - Prototyping Board - Temperature sensor
Introduction
This tutorial will go through on how to connect the Microchip MCP9700A temperature sensor with our prototyping board. The temperature sensor is a fundemental measure for hardware systems, particularly in satellites. The need to know the internal temperatures of the computing area is important to regulate heating and cooling of the computing area to maintain ideal operation conditions.
What you need
Microbit
2 x AAA batteries
Space Ops Carrier Board
Space Ops Prototyping Board or any prototyping board
Micro USB cable
MCP9700A temperature sensor
3 x jumper cables , Male - to - Male.
Temperature Sensor Setup Instruction
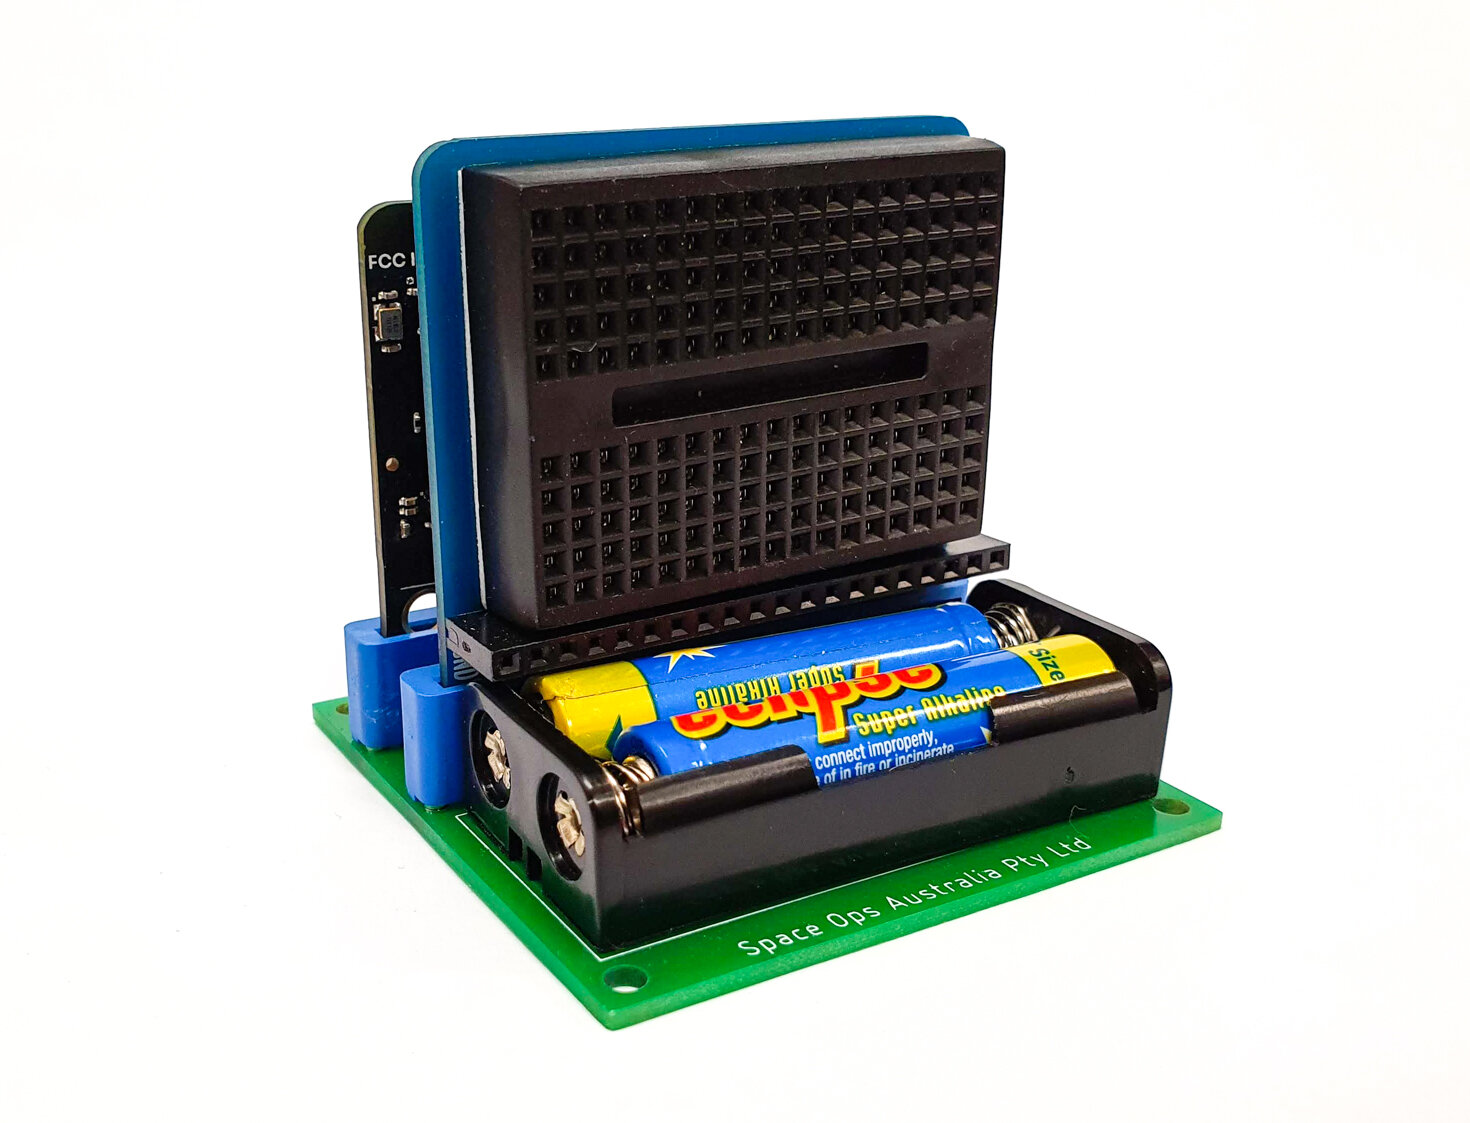
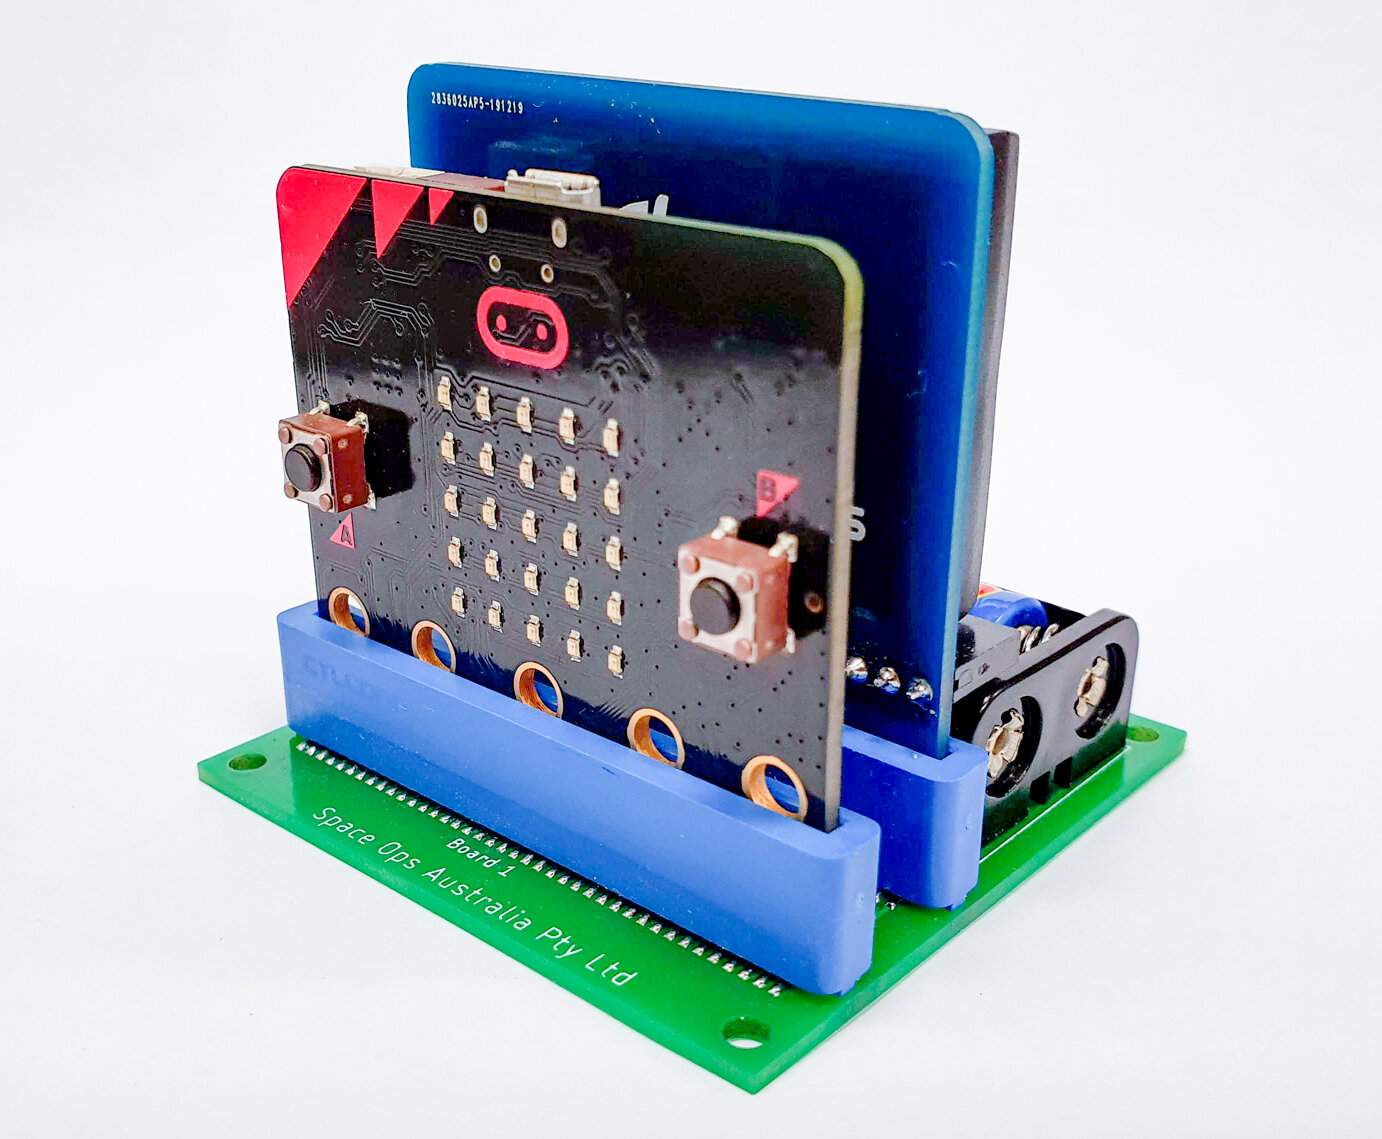
1. Attach the Micro:bit and breadboard to the PCB as the diagrams shown below.
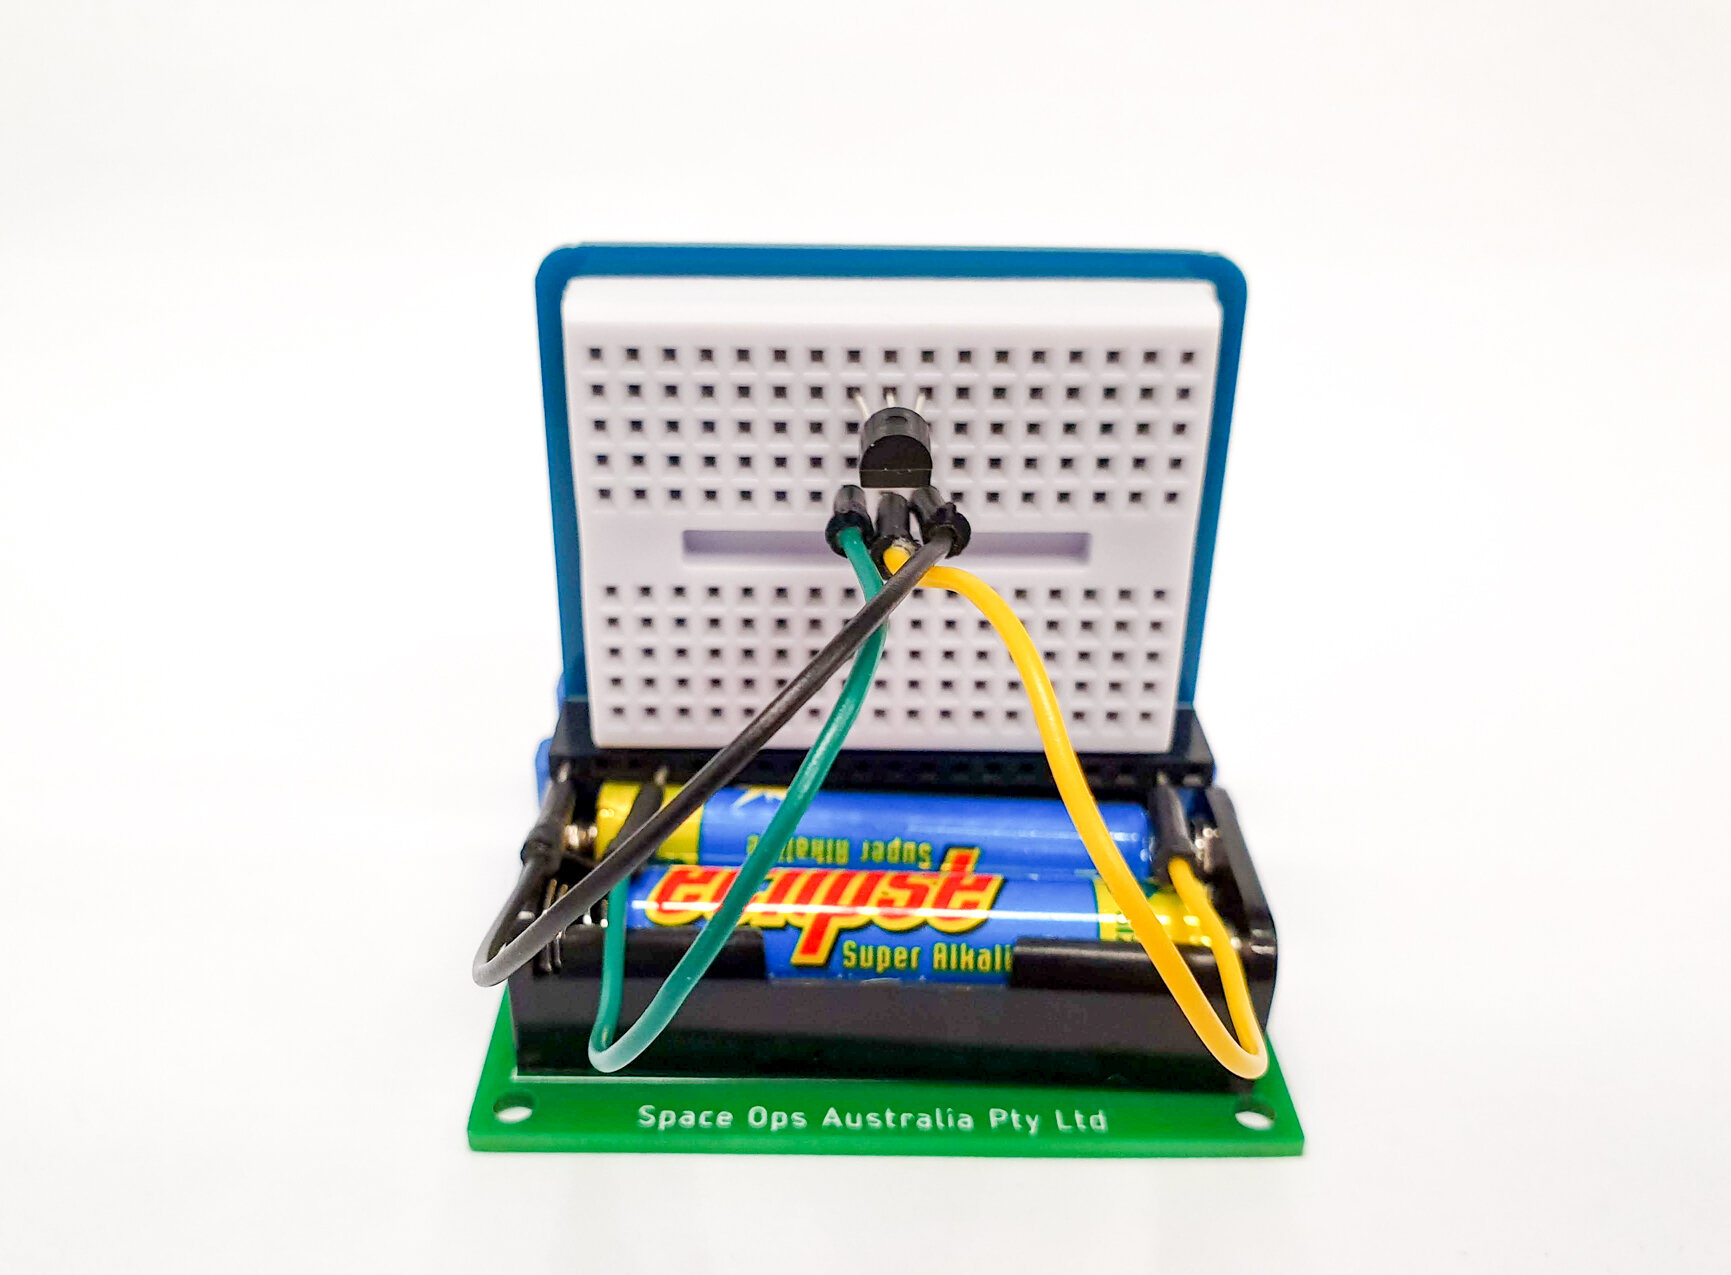
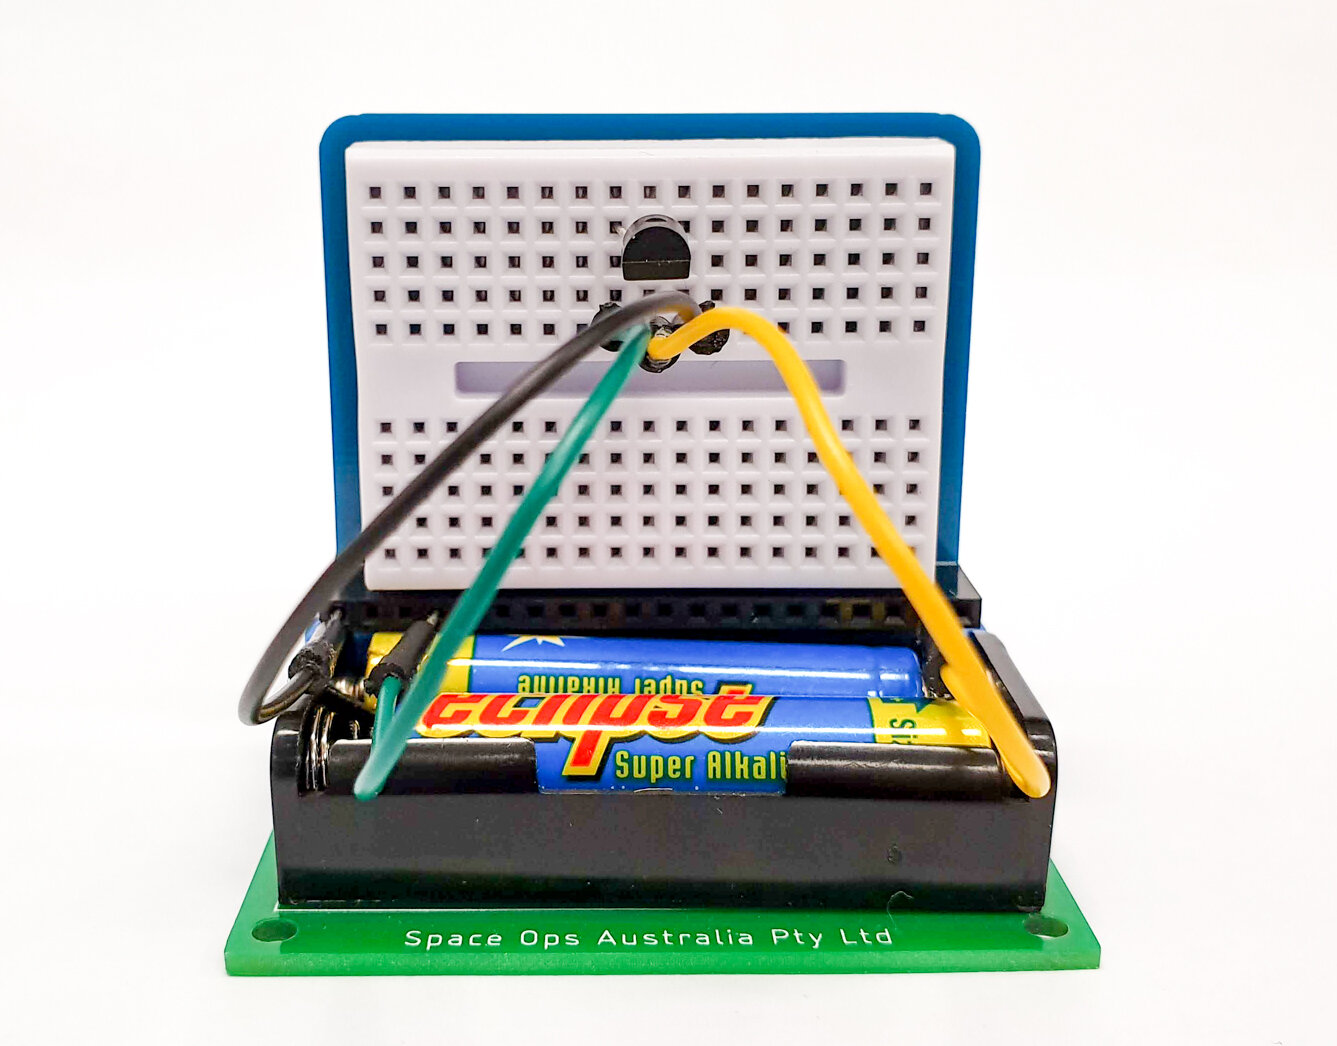
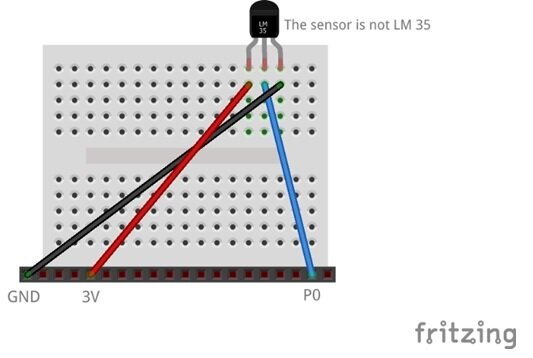
2. Wire the sensor as the diagram shown below. The temperature sensor has three legs: ground, power and data. Use the flat area of the temperature sensor to help guide the orientation of the sensor. Here, the flat side is facing towards the header.

3. Connect the Micro:bit and the computer using a USB cable. When connected in Windows for the first time, there will be a display for drivers install.
4. Browse the website https://makecode.microbit.org/# using Google Chrome
5. Its Coding Time!
a. Copy the following code to the JavaScript page of the editor.
let temperature = 0
basic.forever(function () {
basic.pause(500)
temperature = Math.round((pins.analogReadPin(AnalogPin.P0) * 0.002932 - 0.5) / 0.01)
serial.writeValue("temp", temperature)
basic.showString("" + temperature)
})
b. Click the download button on the left bottom part of the editor.
c. Once downloaded, click on the Show console Device button.
d. The webpage will now update the page and display graphs and a output box.
6. Play around with the sensor by holding it or blow air to it. Observe the temperature changes.

Explanation
This is an amazing temperature sensor because the output of voltage compared to the temperature is very linear when looking on a graph. Straight lines are the easiest to describe mathematically, and makes our job easier.
The equation incorporates the need to scale the values of 0 - 1023 into a range of 0V - 3V. The datasheet which describes the temperature requires the voltage of the pin to then provide a temperature. So, with the equation in hand, we apply the pin value, perform the calculation and the output is the temperature value.
Interestingly, you may know that the Micro:bit infact includes a temperature sensor. The onboard temperature sensor can experience a higher temperature than what would be measured. This is because the onboard temperature sensor is on a shared component. All electronic components heat up. This means the onboard temperature sensor is in fact measuring it’s own onboard temperature. Not necessarily the envrionment temperature.